
Connecting Clients:
What’s the use of having an OpenLDAP Directory if you do not have any clients connected to it? In this article, attaching a Macintosh 10.9 Client to the OpenLdap Directory with standard schemas and storing the contents of our Home Directory on a NFS File Server is demonstrated.

Goals:
- Create POSIX Users and Groups in OpenLDAP Directory
- Use AutoFS to Auto Mount NFS Share
- Connect Macintosh Client to OpenLDAP Directory using Open Directory Utility
Requirements:
- OpenLDAP Directory
- NFS File Server
- Macintosh 10.9 Client
Working OpenLDAP Directory Server:
At this point, you must have a working OpenLDAP Directory Server to continue. If you do not, please review the first 5 parts of this article. If you already have a working OpenLDAP Directory Server, please ensure the correct schemas and a name server switch utility or daemon are utilized.
In addition, the OpenLDAP Directory Server database requires existing POSIX User and Group Accounts. Again, you can refer to Part II of this article in order to use phpLDAPadmin to manage your OpenLDAP Directory.
For this demonstration, an ou (organizational unit) User and two POSIX User Account are created in ou=Users,dc=loga,dc=us:
Users:
Larry Hall -->> cn=Larry Hall,ou=Users,dc=loga,dc=us
Shane Camp -->> cn=Shane Camp,ou=Users,dc=loga,dc=us
Note: For additional information on creating users and groups, please refer to Part II of the article.
Modifying /private/etc/openldap/ldap.conf:
OS X contains the OpenLDAP Client in /private/etc/openldap/ldap.conf. It is necessary to modify the ldap.conf file to your environment.
#
# LDAP Defaults
#
# See ldap.conf(5) for details
# This file should be world readable but not world writable.

BASE   dc=loga,dc=us
URI    ldap://ldap1.loga.us

SIZELIMIT      0
TIMELIMIT      15
DEREF          never

TLS_REQCERT    demand
TLS_CACERT     /private/etc/openldap/cacert.pem
Using Autofs to Automatically Mount an NFS Share
OpenLDAP Server is often used to redirect the home directories of the clients to an NFS Share. On a Macintosh Client, Autofs can be utilized to automatically mount an NFS Share thus making this task significantly easier.
For extensive documentation on Autofs, please refer to Apple’s documentation here: Autofs
Prerequisite:
An NFS Server with the appropriate file shares configured is required to continue with this demonstration. Due to the limited time, the creation of a NFS Server and requisite share are not shown here. However, if you do not have access to an NFS Server, please continue to the next section “Configuring OS X Macintosh 10.9 Client” since your home directory can be redirect to the local hard drive. Pay close attention to Step 16.
Step 1:
Open Terminal:

Step 2:
Edit /etc/auto_master file and verify the information in auto_master is the same as yours. In particular, pay close attention to the “/Network/Servers -fstab” entry. This file should not have to be modified. Just verify entries.
# sudo vi (or nano) /etc/auto_master

Step 3:
Exit editing the auto_master file and create a file the file /etc/fstab and add the following information regarding your NFS Server. After you finish this step, please reboot your system to ensure the NFS Share will mount on reboot.
# sudo vi (or nano) /etc/fstab

Step 4:
Note: Mac OS X also adds an option to fstab entries called “net”. When this option is specified, the mount point “/mnt/HomeDir” is ignored, and the trigger and resulting mount reside in the path specified in /etc/auto_master, usually /Network/Servers. This means the NFS Share will not be mounted on “/mnt/HomeDir” on the Client’s Machine. However, if you open the Finder and look at the Sidebar, the Shared category has “All…” which displays all the connected Network Servers and shared computers.

Connecting OS X Macintosh Client 10.9:
Step 1:
Open System Preferences and click on “Users & Groups” icon

Step 2:
Click on “Login Options”

Step 3:
Click on “Open Directory Utility”

Step 4:
Click on “LDAPv3”

Step 5:
Click “New…”

Step 6:
Fill in Server Name and click “Continue”

Step 7:
If you receive this message, don’t panic. Just click OK.

Step 8:
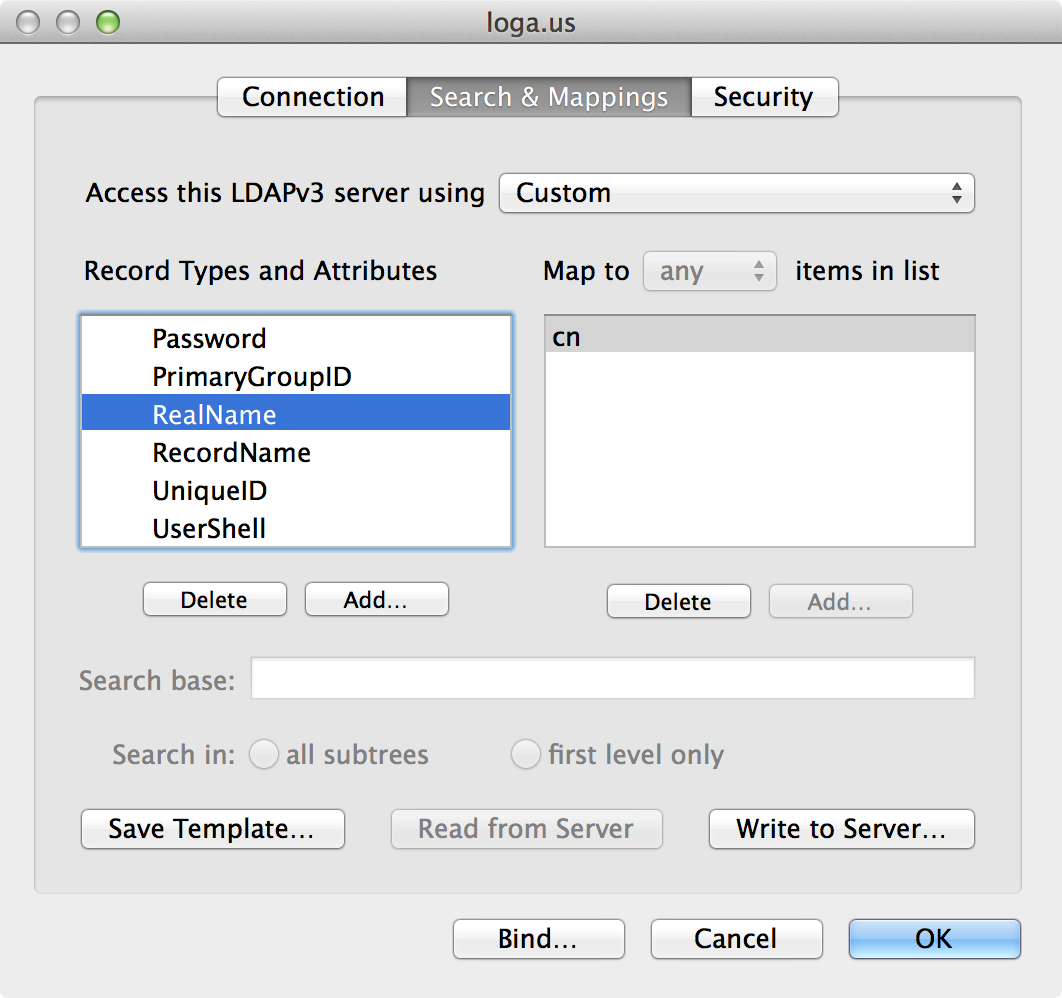
Complete items as shown and click on “Search & Mappings”

Step 9:
Click on “Custom” and change to “RFC 2307”

Step 10:
Enter the Search Base Suffix and click “OK”

Step 11:
Click on “Users” and the click “Add…”

Step 12:
If “Attribute Types” is not selected, select it now. Control Click “AuthenticationAuthority” and “GeneratedUID” then click “OK”

Step 13:
Continuation from Step 12

Step 14:
Click on “AuthenticationAuthority” then Add “uid” on the right hand side

Step 15:
Click on “GeneratedUID” and Add “entryUUID” on right hand side

Step 16:
Click on “NFSHomeDirectory” and Add “#/Network/Servers/192.168.0.224/mnt/zfsvol/nfs1/$uid$” on right hand side. If you do not have access to an NFS Server, one can change this setting to “#/Users/$uid$” to store the home directories on your local hard drive.

Step 17:
Click on “Password” and make sure “userPassword” is on right hand side

Step 18:
Click on “PrimaryGroupID” and make sure “gidNumber” is on right hand side

Step 19:
Click on “RealName” and make sure “cn” is on right hand side
Step 20:
Click on “RecordName” and make sure “uid” is on right hand side

Step 21:
Click on “UniqueID” and make sure “uidNumber” is on right hand side

Step 22:
Click on “UserShell” and make sure “#/bin/bash” is on right hand side

Step 23:
Click on “Security” Tab and ensure no other options are checked then click “OK”

Step 24:
Click on “OK”

Step 25:
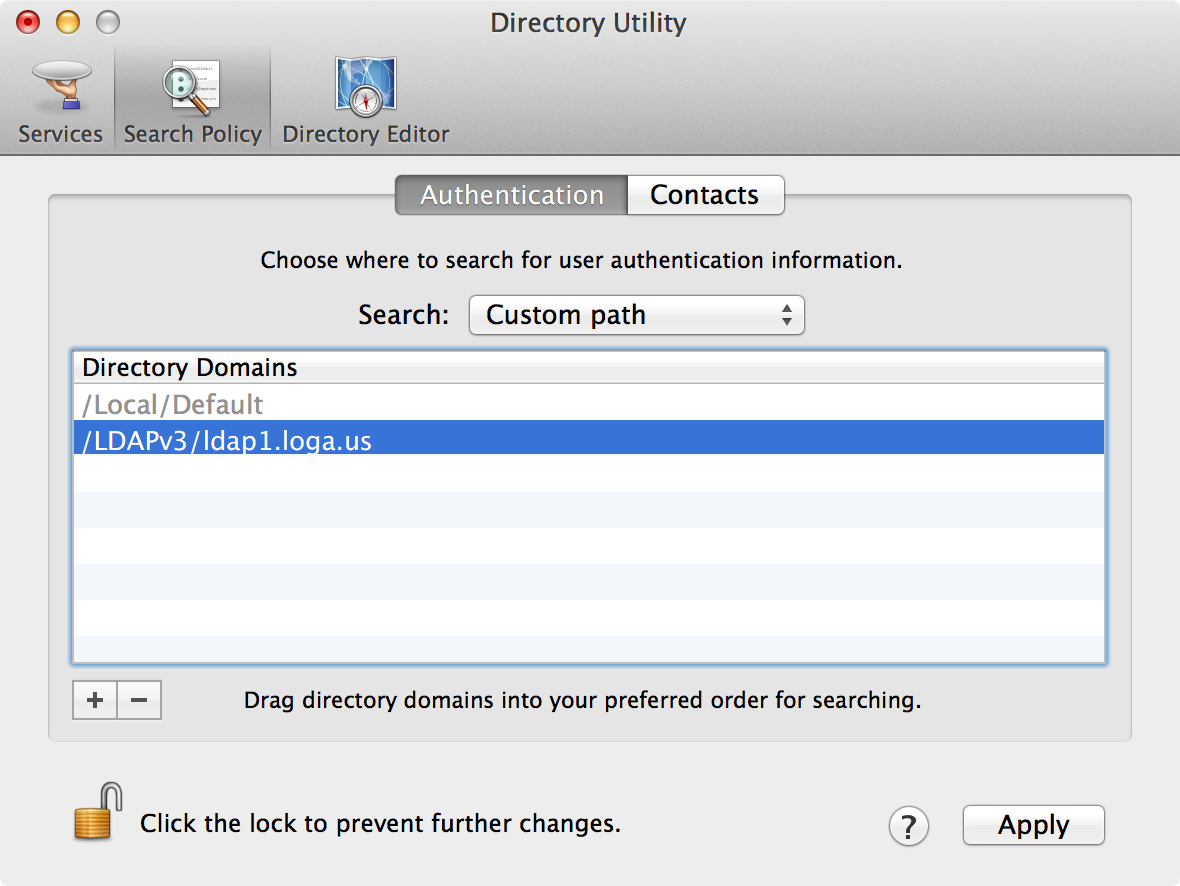
Click on “Search Policy”

Step 26:
Click on “Custom path” and click on the “+” button

Step 27:
Click on “/LDAPv3/ldap1.loga.us” and click “Add”

Step 28:
Click on “Apply”
Step 29:
Click on “Done” Note: The OpenLDAP Server should not display the green jelly if everything is working correctly

Next Steps:
- Check System Preferences -> User & Groups to verify Automatic login is turned off
- Restart to ensure a network login is working correctly. Should see “Other” on login screen.
- Login using “Other” with OpenLDAP credentials
- Open Finder and verify connection to the NFS Share and home directory location

Trouble Shooting:
If you use the network login and the desktop is unresponsive and/or is missing the “Downloads” folder icon (replaced by a “?”) in the Dock, go back and check where your home directory settings. This is an indication the path to the home directory is not correct. Please check the home directory settings in the Open Directory Utility and the user’s home Directory setting in OpenLDAP.
Summary:
Attaching Macintosh Clients to the OpenLDAP server and allowing home directories to be redirected to an NFS Share contains many moving pieces, but is not too difficult at the end of the day. In the next article, an examination of OpenLDAP ACL’s in an effort to tighten up security.
Additional Resources:
http://rajeev.name/2007/11/22/autofs-goodness-in-apples-leopard-105-part-i/